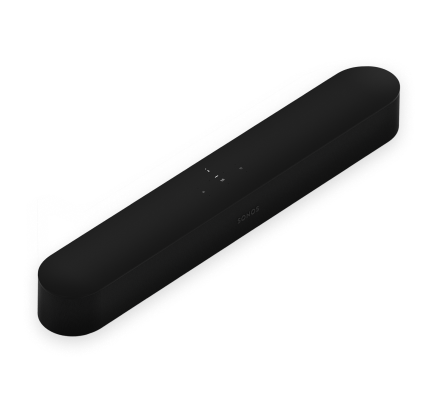

Touch for small adjustments or hold to quickly adjust the volume.
Note: You can also use the Sonos app, your voice, or your TV remote.
Play/Pause
Next/Previous
(music only)
Note: You can’t skip forward or go back when listening to a radio station.

Microphone
Tap to turn the microphone on or off:
Note: If you’ve installed a voice service and the microphone is off, you can still use voice commands. Just press and hold —no need to start with a wake word. When you release the microphone button, voice control turns off again.
Status light
Displays the product's connection to WiFi, indicates when the volume is muted, and signals errors. Learn more
Note: If you don’t want to allow playback or volume adjustments using the speaker touch controls, you can disable them in the room’s settings.

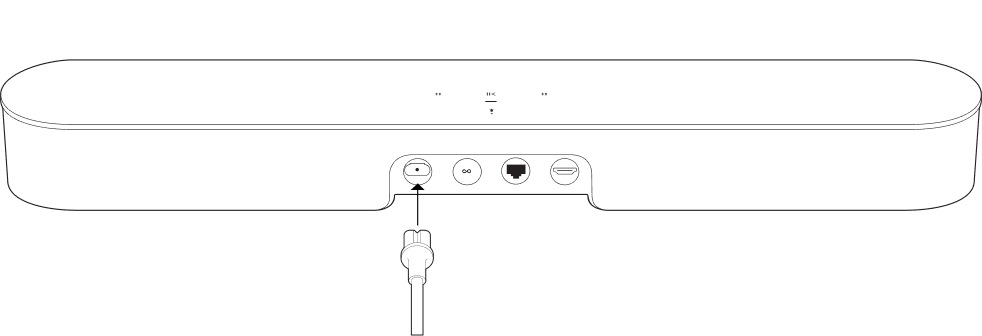
AC (mains) power input
Use only the supplied power cord (using a third-party power cord will void your warranty).
Note: Insert the power cord firmly until it is flush with the soundbar.
Join button
Press to connect during setup.
Ethernet port
Use an Ethernet cable if you want to connect to a router, computer, or network-attached storage (NAS) device (optional).
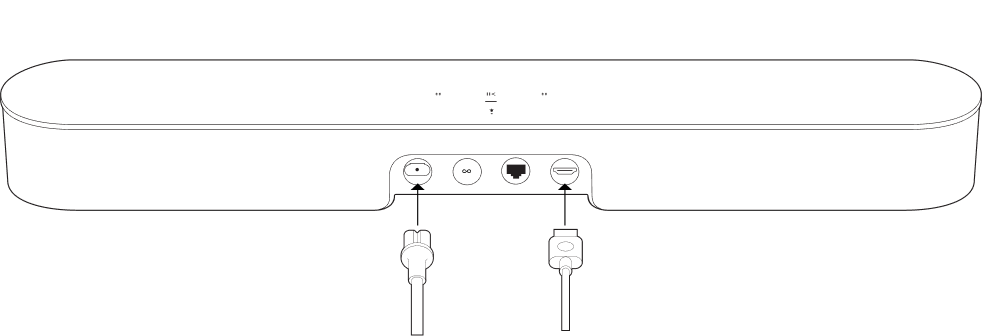
HDMI port
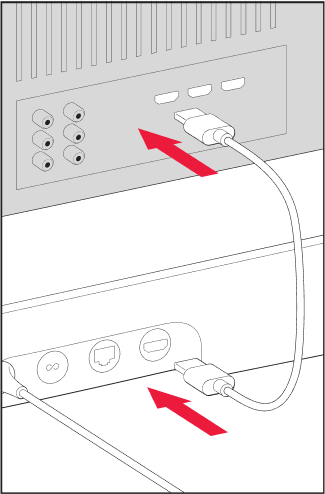
Use to connect the soundbar to your TV.
You can wall mount Beam above or below your TV, or place it on a TV stand.
You can secure the soundbar to a wall with a compatible wall mount. We recommend the custom-designed Sonos Beam Wall Mount. See Wall mount for more information.
Connect the power cord and plug in Beam.
Note: Use only the supplied power cord (using a third-party power cord will void your warranty).
Connect the HDMI cable (included) to Beam's HDMI port.
Connect the HDMI cable to your TV:
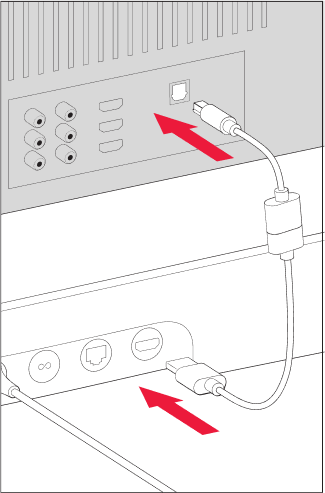
Optical adapter to TV
Use your voice to control your Sonos system with any voice-enabled Sonos product—play and control content, turn the volume up or down, and more.
Note: Voice control isn’t supported in every country yet—this feature will be available as soon as Sonos and a voice service launch together in your region.
The microphone is used for voice control and for microphone-dependent features like Trueplay tuning. Press to turn the microphone on or off—the microphone LED light will let you know when your voice assistant is listening.
When the microphone light is on:
When the microphone light is off:
Every room is different. Trueplay tuning measures how sound reflects off walls, furnishings, and other surfaces in a room, then fine tunes your Sonos speaker to make sure it sounds great no matter where you've placed it.
Trueplay works on iOS mobile devices running iOS 8 or later. During tuning, you'll move around the room holding your mobile device.
Portable Sonos products like Sonos Roam and Move can tune themselves automatically. Auto Trueplay uses your speaker’s microphone to detect the environment and make periodic tuning adjustments so you get great sound wherever your speaker is and whatever you're listening to.
Go to > System, and select your portable speaker to turn on auto Trueplay.
You can customize Sonos products for your surroundings. Go to > System and select a product.
Room Name
If you move your speaker to a new room, you can change its name in Settings.
Turn off WiFi
(not available for Sonos Era 100, Era 300, or portable products)
You can turn off your speaker’s WiFi when it’s connected to your network with an Ethernet cable. This reduces power consumption and can improve connectivity for wired speakers.
For products like Amp and Port, turning off WiFi can reduce the internal temperature when they’re placed in a rack or stacked. Learn more
Note: WiFi is turned off for Era 100 and Era 300 when you connect a Sonos Combo Adapter using the Ethernet cable.
EQ
Sonos products ship with preset equalization settings. You can change the sound settings (bass, treble, or loudness) to suit your personal preferences. Learn more
Trueplay
Trueplay adapts the sound for your surroundings and content. Portable products can tune themselves automatically. Learn more
Volume Limit
You can set a maximum volume for each room. Learn more
Status Light
Displays the speaker’s connection to WiFi, indicates when the volume is muted, and signals errors. Learn more
Note: If the light is distracting, you can turn it off in Settings.
Touch Controls
You can disable the touch control on your speaker. You may want to do this to prevent a child or curious pet from accidentally adjusting playback or volume. Learn more
Battery Saver
(portable products only)
To save battery life, you can set your portable speaker to power off automatically instead of going to sleep. It won't appear in the Sonos app until it’s powered back on.
Line-In
(Sonos products with line-in capability)
When a projector, turntable, stereo, or other audio device is connected to a Sonos product, you can adjust these line-in settings:
Sonos products for your TV provide full-theater sound and play music too. Create a home theater system by adding a pair of rear surrounds and a Sub.
Use the Sonos app to adjust sound settings or change the way your home theater speaker works with your TV.
TV Dialog Sync
If the TV audio is out of sync with the video, you can adjust the audio delay (lip sync) in your room’s settings. Learn more
Group Audio Delay
If you notice audio issues when playing to a group, you can adjust this setting. Learn more
TV Autoplay
TV Autoplay—if music or other content is playing when you turn on your TV, the audio automatically switches to TV audio (default). If you don’t want this to happen, turn off TV Autoplay in your room’s settings.
Ungroup on Autoplay—if your home theater speaker is grouped with other products when you turn on the TV, it automatically drops from the group (default). If you don’t want this to happen, turn off Ungroup on Autoplay in your room’s settings.
Speech enhancement
Makes TV dialog easier to hear. Learn more
Night sound
Enhances quiet sounds and reduces the intensity of loud sounds. Turn on to reduce the volume while still experiencing proper balance and range. Learn more
Remote Control Setup
During setup, you’ll program a remote control. You can program a different remote control any time. Learn more
It’s easy to turn two Sonos speakers (same model), or a Sonos Amp and your favorite non-Sonos speakers, into separate right and left channels for your home theater.
Note: If you group the rooms or create a stereo pair instead, you won't have surround sound.
During setup, surround sound is optimized for your room. These settings are adjustable:
Surrounds
Turn surround sound On or Off.
TV Level
Adjust surround volume for TV audio.
Music Level
Adjust surround volume for music.
Music Playback
Ambient (subtle) or Full (louder, full range). Doesn't apply to Dolby Atmos Music playback.
Find the perfect accessory for your Sonos system—tailored to perfectly fit your Sonos products.
For a full selection of Sonos-compatible stands, wall mounts, chargers and cables, see Accessories on our website.
Note: Don’t discard the template. It may look like packing material.